前言不知道大家注意过没有,现在很多网站上对于界面的跳转,都更倾向于滑动跳转。这种方式更加柔和,使得人的观感会好一些。而我们这一节要学习的是一个导航模型SwipeView,它提供一个基于滑动的导航模型,使得用户可以通过侧向滑动来浏览界面。SwipeView的属性属性- horizontal : 保存滑动视图是否为水平
- interactive : 描述用户是否可以与SwipeView进行交互,设置为true则用户无法滑动
- orientation : 保留方向
- vertical : 保存滑动视图是否垂直
附加属性- index : 保存SwipeView中每个子项的索引
- isCurrentItem : 若子项为当前项,则此属性为true
- isNextItem : 若子项是下一个项目,则此属性为true
- isPreviousItem : 若子项是上一个项目,则此属性为true
- view : 包含管理此子项的视图
SwipeView的例程SwipeView的用法也十分简单,需要为其填充一组页面Page或者是其他的控件,每次可见这组页面中的一页,我们可以通过鼠标左右滑动来在页面之间导航。02 | import QtQuick.Window 2.2 |
03 | import QtQuick.Controls 2.3 |
09 | title: qsTr("SwipeView") |
15 | orientation: Qt.Horizontal |
23 | anchors.centerIn: parent |
32 | anchors.centerIn: parent |
41 | anchors.centerIn: parent |
为SwipeView填充一组矩形充当界面,将当前页currentIndex设置为0,也就是第一页。设置其方向orientation为水平方向,意味着是左右滑动,当设置为Qt.Vertical时,就是上下滑动。最后设置interactive为交互式,其实这个不需要设置,默认为true,当设置为false时,我们就不能通过滑动切换页面了。看一下效果。 
事实上,我们还是建议大家在填充SwipeView的时候选择的是Page组件,Page是一个容器控件,可以方便地将页眉和页脚项添加到页面。它的三个重要属性footer、header、title分别对应着页脚、页眉和标题栏。因为我们的SwipeView本身是不可见的,需要为其设置指示才可以知道当前是第几页。通过page的属性我们可以设置指示栏。 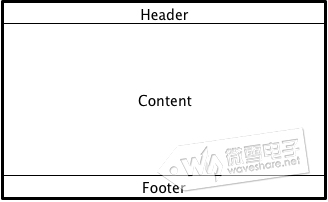
将上述代码中的Rectangle修改为Page,每个Page中除了Text的内容不一样,其他的代码都是一样的。我们就不贴全部的代码了,以第一个Page为例,设置其页眉和页脚,代码如下: 06 | anchors.centerIn: parent |
一般,我们会将将ToolBar,TabBar或DialogButtonBox分配为页面页脚,但是因为这些控件我们还没学到,所以,这里就用到了最简单的Rectangle。为header页眉设置一个矩形,矩形内设置文字指示当前页面。页脚footer就是一个橘黄色的矩形。其实大家也可以设置Page的title和内容物,使得界面更加丰富完整,我们这里就先不拓展了,剩下的几个页面大家可以自己进行设置。看一下效果。 
页面指示符PageIndicator除了上面通过页眉、标题或者内容来指示当前页之外,QML还提供了一种更为简单的指示当前活动页面的控件,它就是页面指示符PageIndicator。页面指示符通常很小(为了避免使用户从用户界面的实际内容中分散注意力)。它们可能难以点击,并且可能不容易被用户识别为交互式。所以,它们最好用于补充主要的导航方法(例如SwipeView),而不是单独使用。它的属性非常简单。主要包括: - count : 保存页数
- currentIndex : 保存当前页面的索引
- delegate : 保存当前页面的索引
- interactive : 保存控件是否为交互式
我们还是以第一个例程为基础,学习一下PageIndicator的使用。 03 | currentIndex: pageIndicator.currentIndex |
05 | orientation: Qt.Horizontal |
13 | anchors.centerIn: parent |
22 | anchors.centerIn: parent |
31 | anchors.centerIn: parent |
41 | currentIndex: view.currentIndex |
42 | anchors.bottom: parent.bottom |
43 | anchors.horizontalCenter: parent.horizontalCenter |
通过前面属性的设置大家应该也很容易明白,设置interactive为交互式,设置count为SwipeView的页面数,设置currentIndex为当前页面。我们想要实现按动PageIndicator实现页面的切换,所以还需设置SwipeView的currentIndex为指示符指示的当前页,这样就实现乐两者的交互。是不是很简单?看一下结果。 
效果上和之前单纯使用SwipeView差不多,但是页面下方多了几个小圆点,这个就是指示符,通过指示符,我们可以清楚的看到一共有多少个页面和当前在第几个页面。我们还可以自己设置指示符的外观,PageIndicator有三个可视化项,分别是background, content item, and delegate,我们看一下官方例程了解一下怎么自定义PageIndicator。 03 | anchors.centerIn: parent |
14 | opacity: index === control.currentIndex ? 0.95 : 0.45 |
可以看到设置了页数为5,当前页是第三页,注意,currentIndex是从0开始的。然后设置PageIndicator的委托delegate,也就是一个个的小圆点,这里有一个opacity透明度需要说一下,它的设置是需要判断一下的,当前页面指示符的透明度就是0.95,其他页面指示符的透明度为0.45。运行看一下效果。 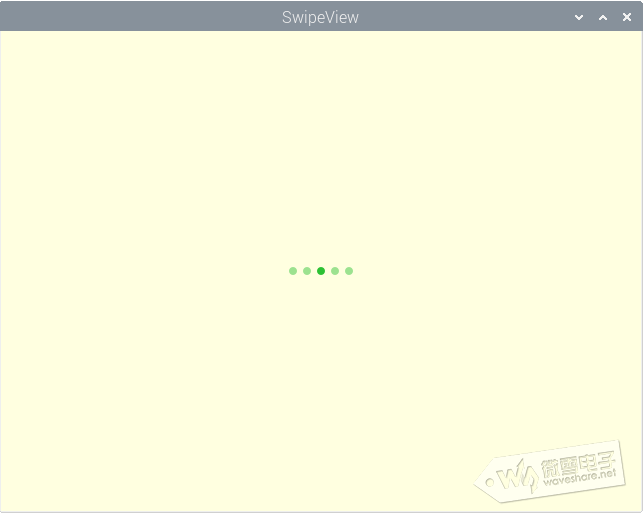
总结
滑动导航模型SwipeView除了指示页面滑动,还有其他的用途,总之应用时很广泛的,下一节我们要讲另外一种导航模型,我们下节再会吧! | 
